


Kubeflow 튜토리얼1
12 Aug 2021 | Kubernetes Minikube Kubeflow목차

본 글은 Local 환경에서 Standard 모드로 설치한 Kubeflow에 대한 튜토리얼 내용을 담고 있다. WSL2-Ubuntu 환경에서의 Kubeflow 설치 방법에 대해 확인하고 싶다면 이전 글을 참고하길 바란다.
1. Notebook Servers
1.1. 노트북 생성
노트북 서버는 Kubernetes 위에서 실행되는 Jupyter Notebook 서버를 의미한다.

+NEW SERVER를 눌러 필요한 설정에 맞게 항목을 입력해준 뒤, Launch 버튼을 클릭하면 노트북 생성이 시작된다.
생성 완료 후 화면은 아래와 같다.
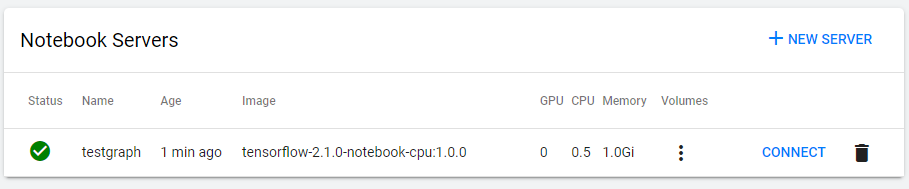
필자는 Dashboar에 처음 접속할 당시 Namespace를 Youyoung으로 지정하였다. 따라서 방금 생성한 노트북은 이 Namespace 아래에 생성된다. 확인해보자.
kubectl get pods –all-namespaces
kubectl get pods -n Youyoung

방금 생성한 testgraph가 보인다.
1.2. 노트북 사용
위 화면에서 CONNECT를 클릭하면 익숙한 Jupyter 환경이 보인다.

2. Pipeline Quickstart
2.1. Data Passing in python components 튜토리얼 실행
Kubeflow 파이프라인은 컨테이너 기반의 ML 워크플로우를 생성/배포할 수 있게 해주는 툴이다. 확장성과 재사용성이 좋아 편리하게 사용할 수 있다. 첫 튜토리얼을 위해서는 공식 문서 가이드에 친절한 설명을 따라가면 된다. 튜토리얼 파이프라인을 클릭해보자.
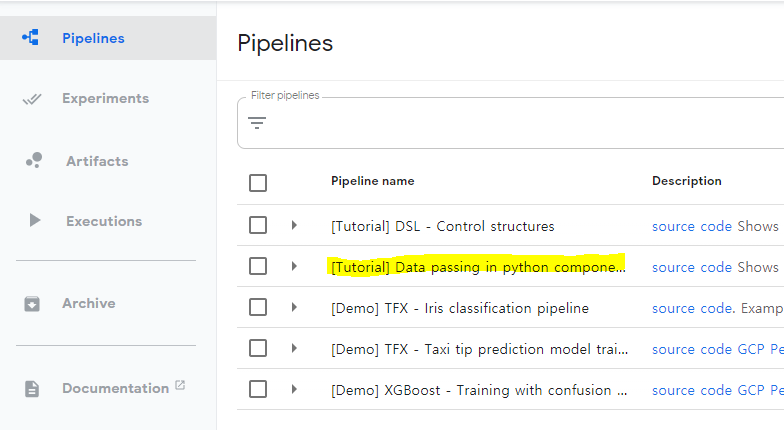
이후 +Create Experiment 버튼을 클릭하고 Experiment Name에 My experiment를 입력해주자. 다음 화면에서 Run Name을 My First Run으로 해준 후, Start 버튼을 누르자.
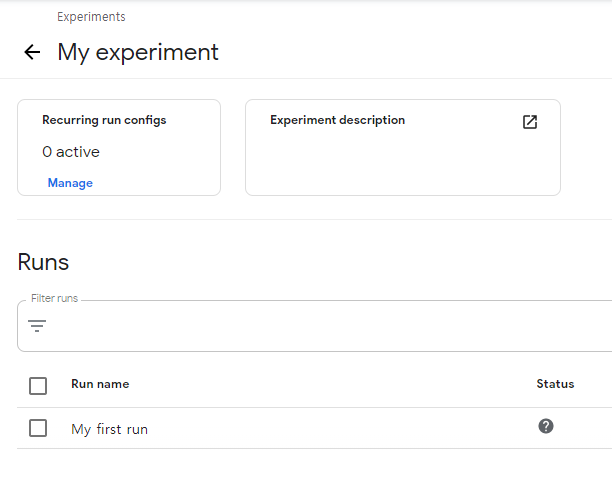
잠시 기다린 후 Run name을 클릭하면 아래와 같이 실행된 Graph의 Component들을 확인할 수 있다.
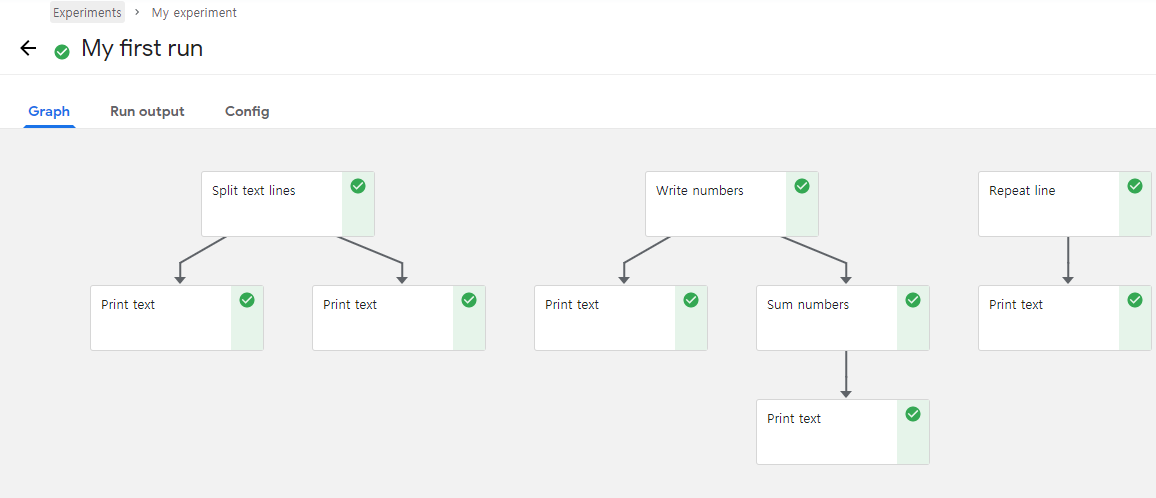
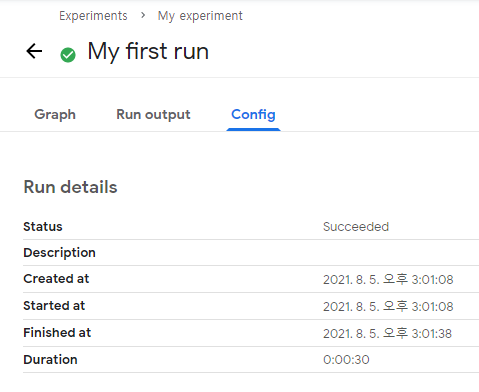
Config 탭을 누르면 세부 사항을 확인할 수 있다.
2.2. Source 코드 확인
소스코드 페이지를 확인해보고 넘어가자. 먼저 서두의 주석을 확인하자.
1) Kubeflow 파이프라인은 Component 인스턴스를 생성하고 이들을 연결함으로써 구성됨
2) 각 Component는 Input/Output을 가짐. Component 간 연결은 이 Input/Output 연결을 통해 이뤄짐
3) 한 Task의 Output을 다른 Task의 Input에서 argument로 취급함
데이터는 Small Data와 Bigger Data가 존재한다. Small Data는 커맨드 라인의 인자로 전달되며 수 킬로바이트를 초과하면 안된다. 예를 들면 숫자, URL, 칼럼 명 등이 이에 해당할 것이다. 작은 리스트나 딕셔너리 혹은 JSON 구조도 괜찮지만 용량 체크는 필수적이다.
Small Data는 string으로 serialized 되었다가 커맨드 라인 인자로 전달될 때 deserialized 되는데, str, int, float, bool, list, dict의 경우 빌트인 serializer를 통해 이 과정이 자동으로 수행되지만 그 외의 경우 직접 data를 반환하기 전에 serialized 되어 있어야 한다.
Bigger Data는 파일로부터 읽기/쓰기된다. 이 때 Input/Output 파일은 문자열로서 함수로 전달된다. InputPath 파라미터를 쓰면 함수는 이에 상응하는 input data를 파일로서 consume한다. 데이터는 다운로드 된 후 로컬 파일로 쓰여진 후, 그 위치(path)를 함수에게 전달할 것이다. OutputPath 파라미터는 반대로 output data를 파일로 생성하고 이를 storage 시스템에 업로드하여 이후의 components에게 전달될 수 있도록 하는 역할을 수행한다. 전달되는 데이터의 Type 역시 명시적으로 지정할 수 있다. OutputPath('TFModel')과 같이 말이다.
자 이제 Bigger Data를 쓰기/읽기 해볼 것인데, 먼저 이전에 확인했던 예제 Graph의 구조를 다시 한 번 확인해보자.
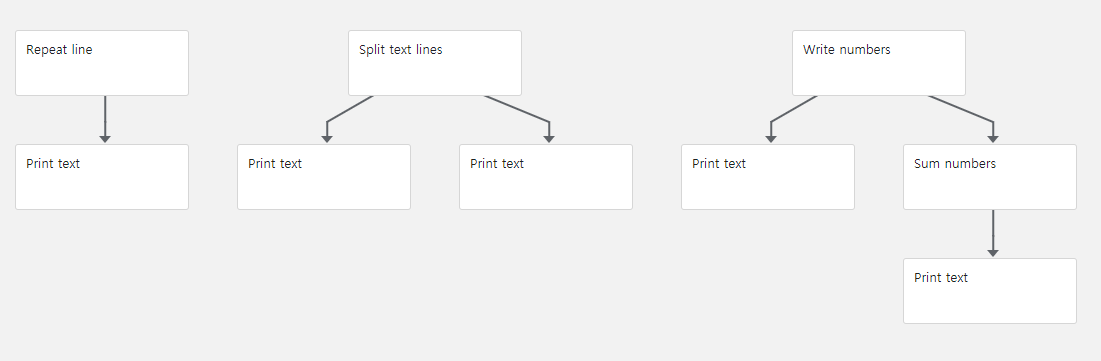
Repeat line, Print Text 부분을 먼저 살펴보자.
from typing import NamedTuple
import kfp
from kfp.components import func_to_container_op, InputPath, OutputPath

# Writing bigger data
@func_to_container_op
def repeat_line(line: str, output_text_path: OutputPath(str), count: int = 10):
    '''Repeat the line specified number of times'''
    with open(output_text_path, 'w') as writer:
        for i in range(count):
            writer.write(line + '\n')

# Reading bigger data
@func_to_container_op
def print_text(text_path: InputPath()):
    # The "text" input is untyped so that any data can be printed
    '''Print text'''
    with open(text_path, 'r') as reader:
        for line in reader:
            print(line, end = '')

# 먼저 repeat_line, print_text 함수를 정의한다.
# 이 때 각각의 함수는 인자로 OutputPath와 InputPath를 사용하는 것에 주목하자.
# repeat_line의 경우 OutputPath에 쓸 대상을 전달하고,
# print_text의 경우 InputPath에 읽을 대상을 전달한다.

# 이제 실제로 실행시킬 함수를 정의하자
def print_repeating_lines_pipeline():
    repeat_lines_task = repeat_line(line='Hello', count=5000)
    print_text(repeat_lines_task.output) # Don't forget .output !

# Submit the pipeline for execution:
kfp.Client(host=kfp_endpoint).create_run_from_pipeline_func(
    print_repeating_lines_pipeline, arguments={})
다음 단계로 넘어간다.
# ### Processing bigger data
@func_to_container_op
def split_text_lines(
    source_path: InputPath(str),
    odd_lines_path: OutputPath(str),
    even_lines_path: OutputPath(str)
    ):
    with open(source_path, 'r') as reader:
        with open(odd_lines_path, 'w') as odd_writer:
            with open(even_lines_path, 'w') as even_writer:
                while True:
                    line = reader.readline()
                    if line == "":
                        break
                    odd_writer.write(line)
                    line = reader.readline()
                    if line == "":
                        break
                    even_writer.write(line)

def text_splitting_pipeline():
    text = '\n'.join(['one', 'two', 'three', 'four', 'five',
        'six', 'seven', 'eight', 'nine', 'ten'])
    split_text_task = split_text_lines(text)
    print_text(split_text_task.outputs['odd_lines'])
    print_text(split_text_task.outputs['even_lines'])

# Submit the pipeline for execution:
kfp.Client(host=kfp_endpoint).create_run_from_pipeline_func(
    text_splitting_pipeline, arguments={})
이제 마지막 단계이다.
# Writing many numbers
@func_to_container_op
def write_numbers(numbers_path: OutputPath(str), start: int = 0, count: int = 10):
    with open(numbers_path, 'w') as writer:
        for i in range(start, count):
            writer.write(str(i) + '\n')


# Reading and summing many numbers
@func_to_container_op
def sum_numbers(numbers_path: InputPath(str)) -> int:
    sum = 0
    with open(numbers_path, 'r') as reader:
        for line in reader:
            sum = sum + int(line)
    return sum


# Pipeline to sum 100000 numbers
def sum_pipeline(count: int = 100000):
    numbers_task = write_numbers(count=count)
    print_text(numbers_task.output)

    sum_task = sum_numbers(numbers_task.outputs['numbers'])
    print_text(sum_task.output)


# Submit the pipeline for execution:
kfp.Client(host=kfp_endpoint).create_run_from_pipeline_func(
    sum_pipeline, arguments={})

# Combining all pipelines together in a single pipeline
def file_passing_pipelines():
    print_repeating_lines_pipeline()
    text_splitting_pipeline()
    sum_pipeline()

if __name__ == '__main__':
    # Compiling the pipeline
    kfp.compiler.Compiler().compile(file_passing_pipelines, __file__ + '.yaml')
2.3. pods status 확인
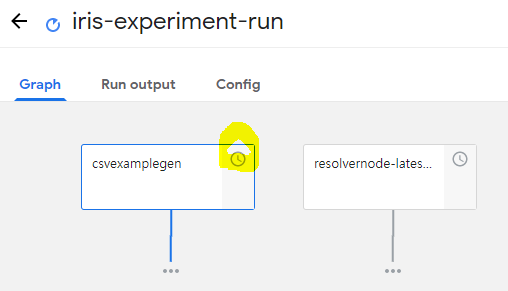
만약 어떤 pipeline을 실행하고 있는 과정에서 아래와 같이 Status가 Pending execution이라면 Container를 생성하고 있는 중일 것이다.
아래 명령어를 통해 본인이 생성한 Kubeflow의 Namespace에 있는 pods의 상태를 확인할 수 있다.
kubectl get pods -n {YOUR_NAMESPACE}
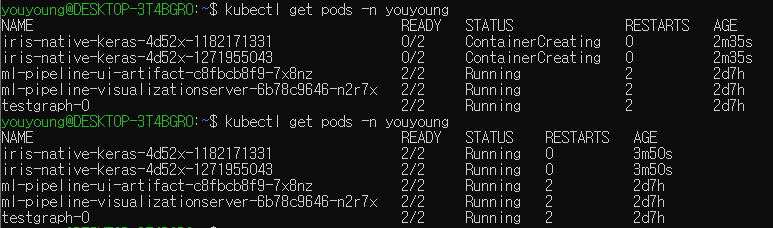
시간이 지나면 위와 같이 running 상태로 바뀔 것이다.